
Care & How-To
How to Fix Dry, Grey, or Fuzzy Wooden Utensils
By Lesvos Woodcraft · 8/16/2026
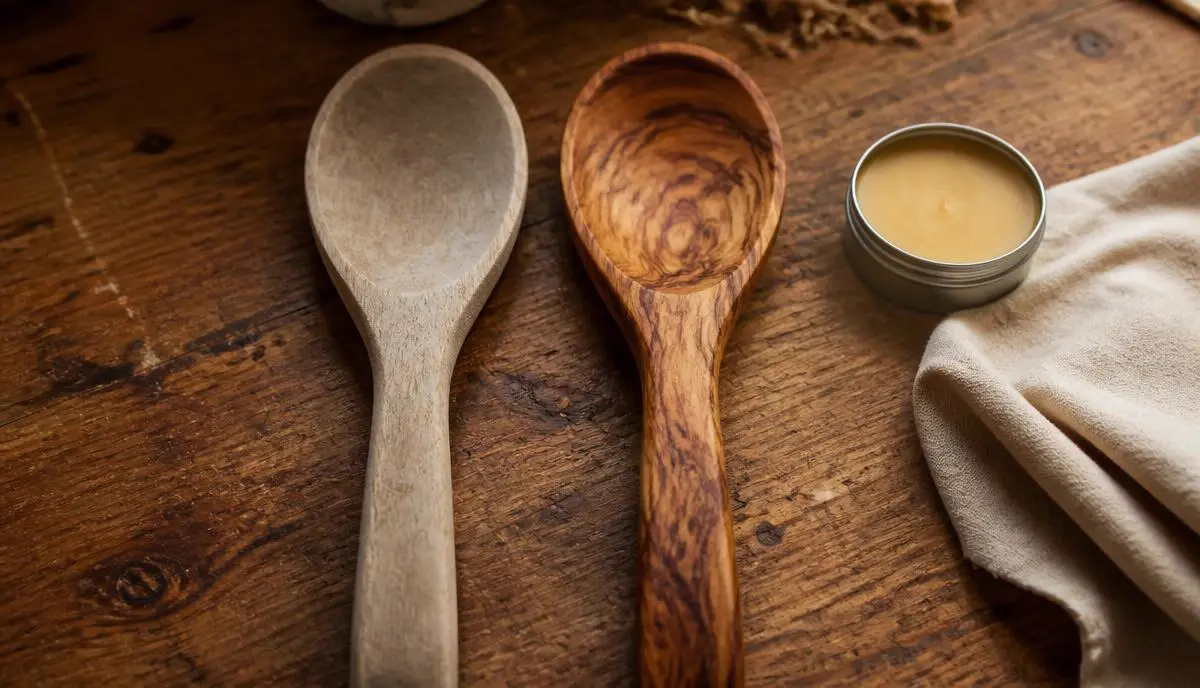
Grey and fuzzy means dry, not dirty
Every wash pulls a little oil out of the surface of a wooden utensil. Do that for a few months without putting anything back and the wood goes pale, the colour flattens out, the grain lifts slightly, and the whole thing feels chalky or fuzzy under your thumb.
People usually respond by scrubbing harder, which makes it worse — abrasion raises the grain further. What the piece needs is oil worked back into it.
The good news is that this is almost always reversible. A dry spoon is a maintenance problem, not a dead one.
Step one: let it dry out completely
Do not oil a damp utensil. Oil will not penetrate wet wood, and you end up sealing moisture into the grain, which is the situation that causes cracks in the first place.
Leave the piece out somewhere with airflow for a full day, longer if it has been soaking or through a dishwasher. Room temperature and moving air — not a radiator, not direct sun, both of which dry the surface far faster than the core and create the same uneven stress.
Once it is dry to the touch and no longer cool, it is ready.
Step two: sand only if you need to
If the surface feels rough or fibrous, a light pass with fine sandpaper — 220 grit or finer — in the direction of the grain knocks the raised fibres down and gives the oil clean wood to sink into. Light pressure, a few strokes, then wipe the dust off with a dry cloth.
Skip this on a piece that is only faded and still smooth. Sanding is for texture, not colour; the oil handles the colour.
Never sand across the grain, and do not chase out deep marks or stains. Knife scores and cooking stains are part of a working utensil, and sanding hard enough to remove them changes the shape of the piece.
Step three: what to use, and what to avoid
Use a food-safe finish that will not spoil: food-grade mineral oil, a beeswax-and-oil balm, or a hardening oil intended for kitchenware.
Do not use plain olive oil, sunflower oil, or other kitchen cooking oils. They are not drying oils — they sit in the grain and eventually go rancid, which leaves a sour smell and a sticky surface that is much harder to fix than the dryness you started with. This surprises people given what we make, but it is the honest advice.
We finish every piece in our workshop with a balm of beeswax and cold-pressed linseed oil, and we sell the same one as our Olive Wood Care Balm. The linseed oil soaks into the grain and the beeswax seals the surface, which is why it holds up noticeably longer between treatments than oil alone.
Step four: apply, wait, wipe back
Take a small amount on a cloth or your fingers and work it into the wood along the grain, covering the whole piece including the handle and the underside of the bowl. Do not be shy on a very dry utensil — it will drink the first coat straight in.
Let it sit several hours; overnight is better. Then wipe off everything that has not absorbed. Leaving excess on the surface is what makes a utensil feel tacky rather than smooth.
If the wood still looks thirsty after the first coat, do it again. Two or three rounds is normal on a badly neglected piece. Our care guide walks through the application step by step.
Why some utensils dry out faster than others
If one spoon in your drawer goes grey every month while another looks the same after years, the difference is usually the wood, not your habits.
Open-grained, lower-density woods hold less oil and lose it faster, so they fade, fuzz, and need conditioning far more often. Denser hardwoods with a tight grain hold a finish longer. Olive wood sits at the dense, tight-grained end of the range used for kitchen utensils, which is a large part of why it is considered one of the better woods for pieces that get used daily — it takes on less water, keeps its colour and depth longer, and generally needs oiling less often than a cheap softwood utensil.
That is not a reason to skip conditioning. Every wooden utensil dries out eventually; dense wood just gives you a longer interval and rewards the maintenance with more years of use. Our own pieces are carved from Lesvos olive wood — you can see the range in our olive wood utensils collection.
When a utensil is past saving
Condition a small surface crack rather than replacing the piece — work the balm directly into it and let it soak in. That will not close the crack, but it stops it spreading, and most small cracks are cosmetic rather than structural.
The point to stop is a crack you can flex, a split that runs through the piece, a bowl that has warped so it no longer sits flat, or a handle that has gone soft or smells sour from rancid oil. At that stage it is no longer a good cooking tool.
If it is one of ours, get in touch — every piece we make is backed by a 30-day guarantee. And once a piece is back in shape, keeping it that way is mostly about the wash: how to clean wooden spoons and the full olive wood care routine cover the rest.
Frequently asked questions
Keep reading